Laser Marking Setup Guide: From Installation to First Mark
When you set up a laser marking machine properly, you turn raw materials into a tool for precise marking. This complete guide walks you through every step, from putting your system together to making your first high-quality mark, so your investment pays off right away. Whether you're engraving intricate designs on jewelry or marking metal parts for aerospace tracking, knowing the basics of installation and operation will help you avoid expensive mistakes and finish your work faster.
Understanding Your Laser Marking Machine Before Installation
Picking the right technology is the first step to making marking activities go smoothly. There are three main types of laser marking machines, and each one is designed to work with different materials and meet different industry needs.
Core Laser Technologies and Their Industrial Applications
Through optical fiber amplification, fiber laser systems create beams with a wavelength of about 1064 nm, which makes them very useful for marking metal. These methods are great at identifying car parts, keeping track of tools, and coding electronic parts. The high quality of their beams leaves lasting marks on treated plastics, stainless steel, aluminum, and titanium without using any materials.
CO2 lasers work at a wavelength of 10,600 nm, which is perfect for wood, leather, glass, and some plastics. CO2 laser technology is useful for many different types of industries that need to add codes to boxes, make plastic awards, or mark rubber parts. But bare metals need special coats because infrared waves in this range reflect off of smooth metal surfaces.
UV laser marking machines use 355 nm ultraviolet light, which lets heat-sensitive objects be "cold marked." When thermal damage must be avoided, this technology is a must for companies that make PCBs, medical devices, and medicine packages. The very small spot size allows for writing with great accuracy down to 10 microns, which meets strict standards in the electronics business.
Critical Components Affecting Setup and Performance
Knowing how your system is built makes startup and fixing problems easier. The beam comes from the laser source. Fiber laser marking machines usually last 100,000 hours, while standard lamp-pumped systems only last 30,000 hours. The galvanometer scanning system guides the beam with accuracy measured in microradians. This lets advanced systems mark at speeds of up to 7000 mm/s.
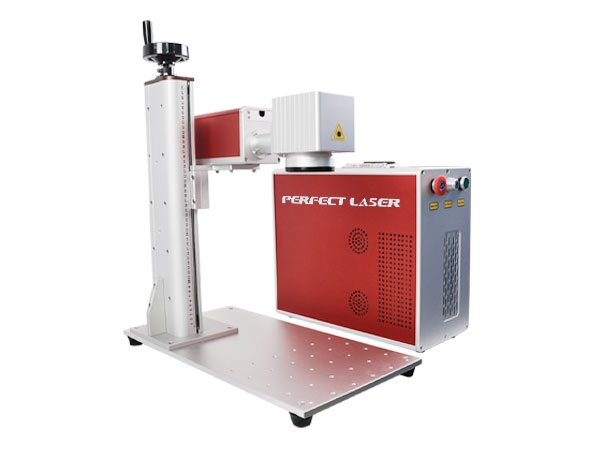
Cooling systems keep things running at the right temperature. Most industrial settings are good for air-cooled systems because they don't need any water infrastructure and can run continuously. Water-cooled versions can handle higher power tasks, but they need to be checked for temperature and coolant upkeep is needed on a frequent basis. The control computer has its own software that uses complex path optimization methods to turn design files into exact marking directions.
Site Preparation and Environmental Compliance
Your placement setting has a big effect on how long equipment lasts and how well it marks. Stable temperatures between 50°F and 95°F keep thermal drift from changing the accuracy of measurements. Controlling humidity below 85% non-condensing keeps optical parts from breaking down. Particulate matter created during writing can be removed with enough air flow. This is especially important when working with plastics or treated materials.
The electrical grid must provide stable power that meets the needs of your system. Most commercial fiber laser marking machines need single-phase 110V to 220V supplies that are properly grounded to stop electromagnetic interference. Sensitive gadgets are kept safe by dedicated lines with surge protection. The space should be big enough to fit the machine plus an extra 24 to 36 inches for servicing access, air flow, and safety zones for operators that meet OSHA and ANSI Z136 laser safety standards.
Step-by-Step Installation Process of Your Laser Marking Machine
Installing things in a methodical way keeps problems from happening and makes sure safety rules are followed from the start. This organized method works for all kinds of setups, from small desktop computers to fully integrated production line systems.
Pre-Installation Checks and Preparation
Unpack your things in a clean, temperature-controlled space. Check that all the parts match the packing list. Usually, a fiber laser marking machine system has a marking head, a control cabinet, a computer desk, power cords, lens safety accessories, and calibration targets. Check for shipping damage and take pictures of any problems you find before moving on. Perfect Laser systems come with full diagrams of their parts, paperwork for CE approval, and illustrated quick-start guides that make them ready to use right away.
Make sure the mounting surfaces are level within 0.5 mm all the way across the machine size. In places where heavy machinery is used nearby, vibration separation may be needed because even small movements can affect the accuracy of markings down to the micron level. Place the control box so that cables can reach it and it can still be reached for future repair. Check your compressed air supply if you're using air-assist nozzles to clean up trash while you're writing.
Mechanical Assembly and Electrical Connections
Attach the marking head to your desk or mounting frame using the accompanying tools. Desktops include built-in tables for typical component sizes, whereas lifting-type systems offer Z-axis adjustments for varied workpiece heights. To mark cylindrical items like pipes or bottles, rotary-type fiber laser engravers require an additional rotating center.
Use the supplied cables to connect the laser head to the control box. Use color-coded or numbered connections to avoid misassembling. Ground the system by connecting the grounding wire to earth, not a neutral line. This protects workers from electrical hazards and delicate galvanometer parts from static electricity. For water-cooled models, connect the cooling system lines and ensure the flow follows the directions.
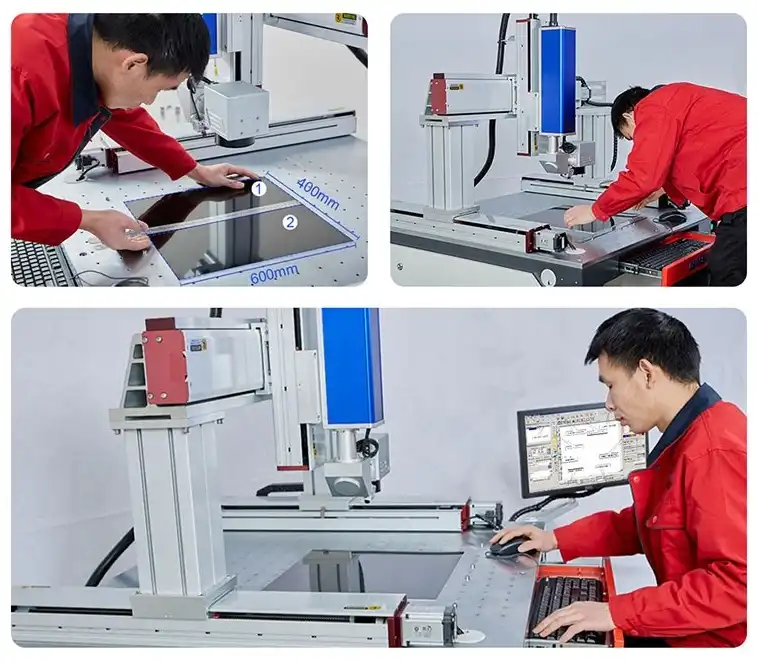
Install a fume generator or air system exhaust connection in your building. Place the exhaust pickup near the region you wish to mark with the laser marking machine without interrupting the laser path or workpiece loading. Make sure the control box is on and the lights work before installing software.
Software Configuration and Initial Calibration
Put the manufacturer's marking software on the control computer. Perfect Laser systems provide simple software for importing vector files, making parameterized text, barcodes, and connecting to a database for changing data. The real-time interface simplifies optimization for varied materials and writing levels.
Write a calibration plate with a test design to begin calibration. The program verifies measurements and corrects writing field visual distortions. Change focus height using the scale or auto-focus. The correct focus distance maximizes material surface energy density. Lenses affect this distance. For instance, 100 mm lenses are appropriate for little electronics, whereas 420 mm lenses are better for vehicle parts.
Test the laser's output at low power and use an alignment card to observe the beam. Gradually increase power while testing patterns on standard materials, verifying mark quality and altering speed, frequency, and power. Note these default settings for future usage. They help start adding materials or portion forms.
From Installation to First Mark – Operating Your Laser Marking Machine
To move from installation to production, you need to know how parameters relate to each other and how materials interact with each other. Getting your first good marks validates the setup and boosts your trust in your ability to use it.
Preparing Your First Marking Job
Put a sample work in the marking area. Fixturing prevents movement during marking—even tiny changes create multi-pass alignment errors. Magnetic holds work well for non-magnetic flat metals, whereas vacuum chucks work well for magnetic ones. Using spinning tools, V-blocks support cylinders.
Import your label design or utilize the software's capabilities. Vectors outperform raster pictures in quality. Vectorize logos and designs if possible. Clean-edged true-type fonts appear better on text. Built-in manufacturers check barcodes and QR codes for size and errors to ensure reliable scanning.
Put the picture in the marking area using the software's viewing capabilities. Measure the genuine parts to ensure the design positioning accounts for manufacturing part tolerances. Name the job file with the part number, material, and marking settings so you can locate it later.
Parameter Selection for Different Materials and Effects
Learning the differences between writing, carving, and etching helps you set parameters. Laser writing affects surface color without removing material via oxidation or annealing. It offers metals high-contrast effects while maintaining form. This approach may add serial numbers, date codes, and names to laser-cut pieces.
Engraving creates haptic, deep lines by cutting away material. Higher power and slower speeds evaporate the substrate material, making it ideal for mold identification, permanent marking, and decorative usage where the mark can withstand slight size changes. Controlling engraving depth requires many attempts. Normal engraving depth is 0.05–0.5 mm, depending on material and application.
Etching removes a little quantity of material, producing visible markings with minimal portion change. This procedure is good for medical equipment, aviation parts, and electronics where extensive cutting might compromise the structure. Try parameters plannedly. Start with the maker's settings, then modify one variable at a time while testing.
Here are some tips for adjusting the parameters for popular materials:
1. Stainless Steel:
- Use frequencies between 20–100 kHz with moderate power to create dark oxide markings on stainless steel.
- Marking speed usually ranges from 1000–3000 mm/s, depending on the contrast level required.
- Lower frequencies combined with higher power settings can achieve deep engraving that remains permanent even after surface finishing.
2. Aluminum:
- Anodized aluminum can be marked easily with relatively low power settings.
- Bare aluminum requires stronger laser settings and may benefit from coating chemicals to improve marking visibility.
- Adjusting the focal position is important: focusing slightly above the surface creates wider lines, while focusing below the surface improves fine-detail engraving.
- A laser marker performs best when the surface preparation and focal distance are properly matched to the material type.
3. Plastics:
- Materials such as ABS, polycarbonate, and acetal are marked through controlled melting or chemical surface changes.
- UV lasers are ideal for plastics because they reduce heat damage and minimize dark burn marks.
- Fiber lasers can also engrave certain plastics that are designed for laser marking applications.
4. Precious Metals:
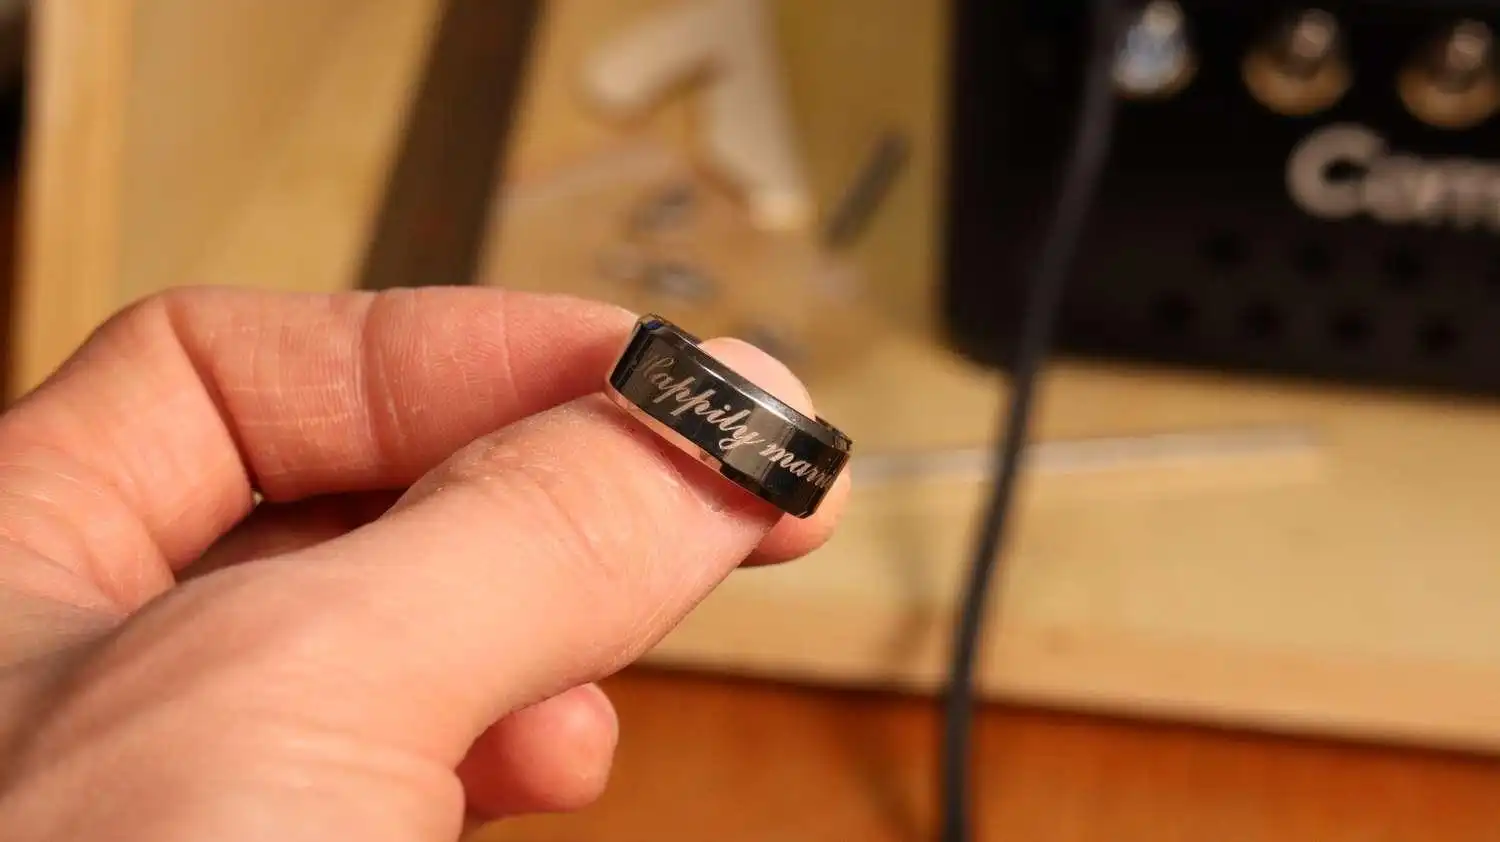
- Jewelry engraving requires precise parameter control to avoid unwanted metal deformation.
- Low power combined with high-speed scanning produces clean and delicate markings.
- Perfect Laser's multicolored fiber laser systems can create decorative color effects on titanium and stainless steel through controlled oxidation layers.
Troubleshooting Common First-Mark Issues
Uneven marks imply inadequate energy transmission. A 1 mm focus distance reduces surface energy density substantially. Using built-in power meters or external sensors, verify that the laser source output and material power parameters are correct.
Maligned marks suggest fixturing or alignment difficulties. Repeat calibration and secure the section. Calibrate galvanometer mirrors after shipment or when temperatures change dramatically. Curved lines show program field correction mistakes.
Transmission of too much energy may burn neighboring lines or destroy material. Power down, speed up, or mark less. The assist air flow should remove dissolved material and prevent its re-formation, which reduces mark quality. Low power? Clean optics. Transmission decreases with lens or window grime.
Essential Maintenance and Safety Practices for Long-Term Performance
Regular care keeps the accuracy of the markings and protects your investment. Safety measures keep workers safe and make sure that all manufacturing processes follow the rules.
Routine Maintenance Schedule
Check writing and exhaust for debris. Cleaning the lens assembly window needs optical cloths and compounds. Dust and fingerprints block laser light, decreasing mark quality. Find damage to workpiece mountings that might shift during marking rounds.
Maintenance checks wire links weekly for wear. Check cooling. Clean air-cooled intake screen and check water-cooled coolant level and temperature weekly. Manufacturer-specified grease moving parts. Lifting-type Z-axis adjustment requires this.
Since components age, calibration every three months keeps labeling correct. Compare current output to initial measurements in testing. Change the field adjustment if measurement accuracy varies too much. Galvanometer mirrors should be cleaned. Mirror repair may need expert support due to perfect alignment.
Systems, laser sources, and safety switches are analyzed and tested annually by professionals. To fix problems quickly, Perfect Laser provides 24/7 technical support and live consultations. A two-year laser source component replacement warranty reduces early production downtime.
Comprehensive Safety Protocols
Laser safety requires proper categorization. Most industrial fiber laser marking equipment are Class 4, requiring extensive operator training. Safety interlock cage door openings to exclude laser light. Laser wavelength, peak power, and safety measures must be shown on warning signs.
Laser safety glasses must be approved for the laser's frequency (1064 nm for fiber lasers, 10,600 for CO2 systems, 355 for UV lasers). For laser power levels, safety glasses with ANSI Z136 optical density protect better than generic ones. Full-enclosed systems reduce laser path, requiring no eye protection. These systems are suited for multi-user, high-volume manufacturing.
Plan to instantly turn off the laser and treat accident victims. Near tools, display emergency contact information. Review operation, hazard detection, and emergency response safety instructions routinely. Track your training and compliance for government inspections.
Materials must be considered while assessing laser radiation risks. Handling certain polymers releases harmful fumes. For prolonged marking, check airflow and consider respirators. Metal marking tiny particles must be collected by exhaust systems. Safety data sheets list material hazards.
Choosing the Right Laser Marking Machine for Your Business Needs
Choosing the right laser marking machine equipment strikes a mix between current output needs and the ability to grow in the future. Knowing what's most important for your application will help you choose the right technology and set it up.
Technology Comparison for Material Applications
Most industrial metal marking uses fiber lasers. The efficiency is 30–40%, greater than lamp-pumped systems that converted 2–5% of power into light. Manufacturing costs and heat load fall. Since compact solid-state construction eliminates alignment-sensitive optical channels, it will last for years without maintenance.
Fiber technology is ideal for 3D printing, vehicle parts, accurate hardware, and construction materials because to its speed and durability. Medical equipment producers like annealed markings' purity and lack of inks or glues. Deep etching that can endure high temperatures, chemicals, and uneven surfaces helps aerospace companies comply tracking standards.
Precision without harm is achieved by UV laser marking in electronics, PCB, and IC manufacturing. Mark FR-4, silicon, and ceramic packages at 355 nm. In pharmaceutical packaging, UV lasers mark date codes and lot numbers on blister packs and bottles without damage.
Perfect Laser offers UV purple light metal laser cutting for fiber laser failures. Cold ablation shields heat-sensitive parts while writing circuit boards or items near plastic housings. Consumer product downsizing may be achieved with 10 micron spots for QR codes under 2 mm square.
Configuration Options Matching Production Requirements
Mini and portable laser marking equipment help low-volume enterprises, job shops, and field service. Because they weigh less than 50 pounds, these systems are convenient to travel between work and client locations. Improved galvanometer technology and optical designs allow smaller systems to mark as well as larger industrial setups in congested production halls without sacrificing performance.
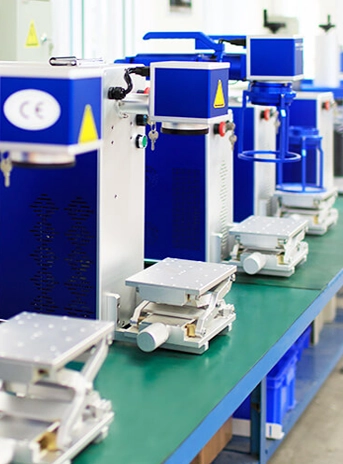
Desktop models house the marking head and control electronics in compact, desk-mounted enclosures. Built-in work spaces may handle 8-by-8-inch pieces for marking tools, carving jewelry, and serializing tiny parts. The plug-and-play connection makes setup simple without additional installation services.
Flat sheets to completed objects may be marked using lifting-type laser marking equipment with a Z-axis that can be modified. Job shops with diverse part shapes and producers who mark at different stages benefit from this versatility. Pneumatic or motorized lifting systems maintain focus throughout manufacturing runs.
Standby systems for automated manufacturing lines may be activated by PLCs or belt sensors. Mark-on-the-fly keeps production flowing without manual addition, which is crucial for high-volume firms because throughput determines revenues. The Perfect Laser's reading speed of 7000 mm/s provides cycle rates of less than one second per item, comparable to assembly lines, injection molding machines, and pressing machines.
Evaluating Total Cost of Ownership
The purchase price is simply one factor in determining long-term value. Operational expenses including power, repairs, and consumables affect ROI estimations. Most fiber laser marking equipment require 300 to 800 watts, compared to kilowatts for previous technology.
Solid-state versions don't require lamp refills or optical correction, therefore maintenance is cheap. Normal lens cleaning and filter replacements keep Perfect Laser air-cooled systems running for years. With a two-year warranty and steady laser source design, you can budget and prevent unexpected maintenance expenditures during busy production periods.
In high-volume usage, throughput impacts profit. Find the difference in marks per shift across the potential systems—a 1000-part-per-day machine requires twice as much capacity to maintain production. Speed advantages like reduced labor expenses and quicker order delivery can offset higher startup costs in company development.
Supplier reputation influences long-term satisfaction beyond equipment specifications. Famous organizations like Perfect Laser provide application testing, operator training, and swift technical support. Perfect Laser's CE, TUV, and SGS certifications demonstrate its commitment to quality and steady performance. The corporation has offices in Germany, Japan, Italy, Russia, Brazil, India, UAE, and Saudi Arabia. This implies your investment will have worldwide support wherever it is run.
Conclusion
When you successfully set up a laser marking machine, it changes the way you can make things. It gives you permanent labeling, better traceability, and more customization choices across many industries. If you follow this guide, you'll be able to achieve operational excellence from the very beginning, from knowing core technologies to getting your first quality marks. Precision is kept up by regular repair, and your team is safe thanks to thorough safety measures. The best return on investment (ROI) is achieved by choosing equipment that fits your unique material needs and output volumes. With a wide range of products that include mini, portable, tabletop, lifting, rotary, UV, and 3D dynamic focus options, Perfect Laser can solve almost any industry marking problem. Their products are reliable and come with a global support network.
FAQ
1. How often should I calibrate my fiber laser marking machine?
How often calibration is done depends on how much is being made and how stable the setting is. Calibration is usually done every three months in places where the temperature and humidity stay the same, but it should be done every month in places where the conditions change. Always readjust when moving machinery, doing maintenance that affects optical parts, or when the accuracy of the measurements changes beyond what was expected. Setting up default test patterns during installation gives you standards to use for ongoing checks.
2. Can one laser marking machine handle multiple material types?
Fiber laser systems can mark most metals and a lot of specialized plastics, especially ones that have chemicals that make them sensitive to lasers. But to get the best results with very different materials, methods that are made for that technology are often needed. UV lasers work best with heat-sensitive materials, while CO2 lasers work better with biological materials. Check out your main types of materials. For example, if 80% of your production is metal, fiber technology is the best option, even though you may need to find other ways to handle non-metal tasks sometimes.
3. What safety standards should I look for before I buy?
For US operations, FDA and CDRH compliance showing the right safety interlocks and labels is needed. CE approval is required for European markets because of the Machinery Directive and Laser Safety guidelines. Check for ANSI Z136 conformance, which means the right rules for guarding and exposure. Manufacturers with a good reputation, like Perfect Laser, provide full certification paperwork that supports regulatory compliance and worker safety program standards without any extra technical work being needed.
Partner with Perfect Laser for Precision Marking Solutions
Are you ready to improve your production with laser writing technology made for industry? Perfect Laser makes complete systems that can be used for any task, from marking microelectronics to identifying heavy industrial parts. We sell a variety of fiber laser marking machines, such as small, portable, desktop, lifting, rotary, UV, and 3D dynamic focus models. All of them are very accurate, stable, and cost-effective, and come with two-year laser source warranties.
Perfect Laser has been making high-quality products since 1995 and has over 25 years of experience. They serve customers all over the world by using 63 protected ideas and strict quality testing, such as advanced power metering and stability simulation. Our free application testing, technical help 24 hours a day, and OEM customization options make sure that your unique needs are met by experts. Email our engineering team at [email protected] to talk about your marking needs and get full specs that fit your production needs.
References
1. Dahotre, Narendra B., and Sandip P. Harimkar. Laser Fabrication and Machining of Materials. Springer Science & Business Media, 2008.
2. Ion, John C. Laser Processing of Engineering Materials: Principles, Procedure and Industrial Application. Elsevier Butterworth-Heinemann, 2005.
3. Steen, William M., and Jyotirmoy Mazumder. Laser Material Processing. 4th ed., Springer-Verlag London, 2010.
4. Ready, John F., and Dave F. Farson, editors. LIA Handbook of Laser Materials Processing. Laser Institute of America, Magnolia Publishing, 2001.
5. Migliore, Larry. Laser Materials Processing. CRC Press, 1996.
6. Chryssolouris, George. Laser Machining: Theory and Practice. Springer-Verlag New York, 1991.

share your inquiry, get the quotation accordingly.
第一张审核员说包含其他公司不能用_1755049724891.webp)
Perfect Laser – Global Manufacturer of Reliable Laser Solutions